Last couple of Christmas cards

Both these cards use a stamp called Angel Chorus Collage, which I thought I had shown on here before, but apparently not. Its made by Rubber Stampede,and is available still, I found it here. I used a technique I saw done a long time ago, in a magazine, but I really can’t remember who by. I stamped the image first on cream card and heat embossed with gold powder. I stamped & heat embossed in gold again onto plain vellum. I coloured the image on the card quite roughly with Promarkers- you don’t need precise colouring, as the vellum softens the look of the colours.Then I tore around the angel images on the vellum, and placed them over the card versions, using some adhesive roller, the Stix2 one.I trimmed the images down and matted onto gold card. The backing paper on the card on the left is from a Joanna Sheen cd, and the other one is, I think, a Paper Pizzaz one, but I may be wrong. I have so many Christmas paper sheets I have had for years, I am trying to get some use from them, and stop hoarding, lol. Both have a rosette on them. I love those, I think I may end up doing rosettes to death if I’m not careful.
You could also colour on the back of the vellum, and oil pastels would work well for that.I just liked the softness that the vellum gave over the card image.

WOYWW #133

              Merry Christmas Everyone!

 Sorry to have been missing for a few weeks- between car breaking down, and extra work, trying to make cards- I’ve been chasing my own tail all the time. I hope everyone is ready (or almost) for Christmas, and want to wish everyone a very Happy, Peaceful and enjoyable Christmas, wherever you are. So, back to the Wednesday Wander around the Workdesks of the World, courtesy of Santas Little Helper, Julia Dunnit at The Stamping Ground.

These are some of the cards I have been working on, using a Dreamweavers Bauble stencil, embossing paste, and adding some glitter to the paste before it dries. I also tried out the Tim Holtz Rosette die I bought at the NEC last month. I  found that by trimming the paper down slightly, I could make different sizes of rosette- then I had to get a couple of small scalloped punches to make the centres, as the original was out of proportion. I did try cutting them down with deckle-edged scissors, but didn’t really like the finished look. Punches are quicker too, 🙂

I also did them using my original Cuttlebug plates, rather than the extended ones, after I looked at the price of them. OMG! HOW MUCH???! I really cannot justify buying them, no matter how often I used them.  I will post the pictures of how I did them on my Cuttlebug page over Christmas, but as you can see, it does work, and is not really difficult. I actually found it much trickier getting the rosettes into shape. That is so fiddly!!!
 These were some made-to-order cards utilising few images I have stamped up previously. I hope you all have a great day, I shall be visiting over the next couple of days- yes, I STILL have some cards to make- and I haven’t bought a turkey yet- the tree & decorations only went up on Monday-I am so going to change my ways next year!

Hi Folks- Christmas is coming….

Sorry I have not been posting for a couple of weeks, we’ve been working a lot, and our car decided he wasn’t going to work anymore! Three weeks in the garage and  OMG – HOW MUCH? later, he’s back to his old self. Anyhow, life is now back to normal- well as normal as I am ever likely to get, which isn’t really saying a lot,honestly.

So, I thought I really need to get around to the Christmas card thing(!), and while I was sorting through various boxes, I found a few cards I had made in previous years, and I decided I would share a couple today. This one goeas back aways, before I really got into stamping. The Santa image comes from a Joanna Sheen cd, as does the matching backing paper. The two corner pieces were from a Docrafts pad, I think. The next one does have a stamped image, the NOEL,which is a u/m clear stamp, and I am sorry but I have no idea who it was by, and some K&Co backing paper.

The same NOEL stamp is used here, and I really love the snowy houses stamp, which is by Inkadinkado, and appears to be a PSX image, which probably means it is no longer available!
 In case anyone wants to try & find it, the code on the stamp is: 94614, PSX-K, Fine Line Classics.
If you enlarge the image, you will see that the trees and Roofs have had fake snow added with a Snow Writer.

Last one for today, you can see I get a lot of mileage out of that NOEL stamp, lol. The Seasons Greetings image is by Hero Arts,K4827, Collage Seasons Greetings. I stamped it in black on some ivory/gold marbled paper.

WOYWW #114

First on my desk this week is another map card.The maps are from a set available from Stamp & Go.com, SIFS65,which features 6 maps, some waves, a couple of ships, and a ship in a bottle. It was stamped in Memento Tuxedo Black onto an alcohol ink background then cut into a mosaic and matted onto black card. The two tags use a stamp from Artifacts, The Stamp Bugs own stamps, Spirit of Adventure Collage. Just went to their site to get the link, and their u.m stamps are on sale at the moment, with 25% off! The Time & Tide stamp is by Paper Artsy, Clocks plate 3, which also features some of the stamps in the third picture I have posted. I sponged old Paper, Antique Linen & Walnut stain Distress inks onto some script background paper and both tags.

  The second card is again using alcohol ink backgrounds, and the Crafty Individuals stamp from a couple of posts ago. The square card base was covered in paper from Dovecrafts Aquamarine Floral Prints paper pack.

Here are some of the clock images from the Paper Artsy plate, stamped onto Distress inked card, cut out then the ‘glass’ created with Glossy Accents. The card was coloured by swiping Distress inks onto a craft mat (mine came from Poundland, a baking sheet) spritzing with water then wiping the card/tag across the ink. Here is a link to Tim Holtz showing how he does it. The clock hands have been cut out using the Silhouette, using a ‘dingbat’ font that features clocks & timepieces.Have a great Wednesday, and if you are new to this idea, visit the Amazing Julia Dunnits Stamping Ground and join the fun.

WOYWW #102

Happy WOYWW to all, lets hope that Blogger decides to let us play this week! I shall try to get around everyone over the next few days- overtime at work, so I am up at 5.00am, not getting home till 4.30 pm, then shower, do lunches, cook dinner, collapse! Anyway, here is my offering for the weekly stalk, lol.

This is what was on my desk this week- a 75th Birthday card for a work colleagues Mom.

  This is how it came together- some gold paper overstamped with an ornate background stamp for the bottom, and some gorgeous embossed vellum by K & Co to 
go on the main panel.

 
 Harlequin Rose panel, Elusive Images, was matted onto Gold card embossed with a Cuttlebug and Forest Branches folder.I wrapped a band of gold organza ribbon round this, then knotted some cream ribbon over it.

Then mounted it onto the front panel.

  I added some triple embossed hearts.
   
   
Then the numbers 75, cut from gold card on my Silhouette, and embossed with the Swiss Dots folder.

My Silhouette.
The finished card, with sentiment cut out with the Silhouette, along with a matt for it. 

Crafty Individuals Butterfly Square

This card features all Crafty Individuals stamps and paper. The background sheet comes from one of their pads of 6×6 background papers, Book 4, Trees. This was overstamped, using Adirondack Denim ink, with CI 021, which is a mixed words stamp. I can’t find this exact stamp on their site now, so possibly it is retired, although there is a very similar one, CI 012. The base card is dark blue, scored & folded, then cut down to 15cm square.
 I cut down the sheet to fit the front of the card, and matted it onto black card. A length of Navy Blue ribbon was wrapped around this panel, then knotted , placing the knot towards the bottom. I mounted this centrally
 on the card front.
The Butterfly Square, CI 135, was stamped in Memento Tuxedo Black, then heat embossed. The image was coloured using Promarkers, then cut out & matted onto Dark Brown cardstock.I mounted this at an angle in the lower right of the panel.
 A Blue butterfly was made from the same stamp using fusible fibres, and I attached this with silicone glue, which also secures the wire anthers.
He is actually a little difficult to see in the main picture, he looks like a patch of blue background colour!, so here he is on his own,lol. Oddly, the butterfly looks bluer in this picture than it does on the card- I was not exactly pleased with how it came out. I have 3 or 4 shades of blue fusible fibres, but they all seem to develop a green tinge when the fibres are heated.

Mixed Monochrome

Ok, I promise this is the last of the monochrome for now(maybe). I just wondered how it would come out if I mixed the two types of images. Better than I expected, to be truthful, lol.I matted the squares onto a black/gold coloured base, then this onto black,white and then black again. I used some of the PDA card in white with silver flecks, and some black & white yarn around the front. As I said in WOYWW, these aren’t true ‘inchies’, as they are closer to 1 1/2″, but I like the size- gives a good sized panel, in whichever format you lay them out.

Monochrome in reverse

As I mentioned in the WOYWW post below, I wanted to do a reverse version of the monochrome card on my desk, and here it is. The stamping was much easier this time round, as I used Memento Tuxedo Black with clear embossing powder- no having to get rid of all the stray specks! It was also starting to have a ‘male’ feel to it, so I stamped a mans face image (Paper Artsy), and the ‘Describe Him’ text stamp, which is by Artifacts, from The Stamp Bug, which pulled it all together.The base card is from PDA Card & Paper, and is black with silver flecks on it- they also have a black with gold flecks, and white with gold or silver flecks. I didn’t have any white webbing spray, ( I don’t even know if there is such a thing), so this card was the best option.It has white eyelash wool tied around the spine instead of ribbon, but was made in exactly the same way.

WOYWW #94

 Blimey, Wednesday already!! Where do these weeks go? Happy WOYWW to everyone,heres my offereing for this week. Get yourself off to our Glorious Leaders site,Julia Dunnits  The Stamping Ground, if you don’t know what this is all about and come & join the fun- legal stalking & snooping, lol.


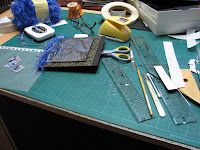
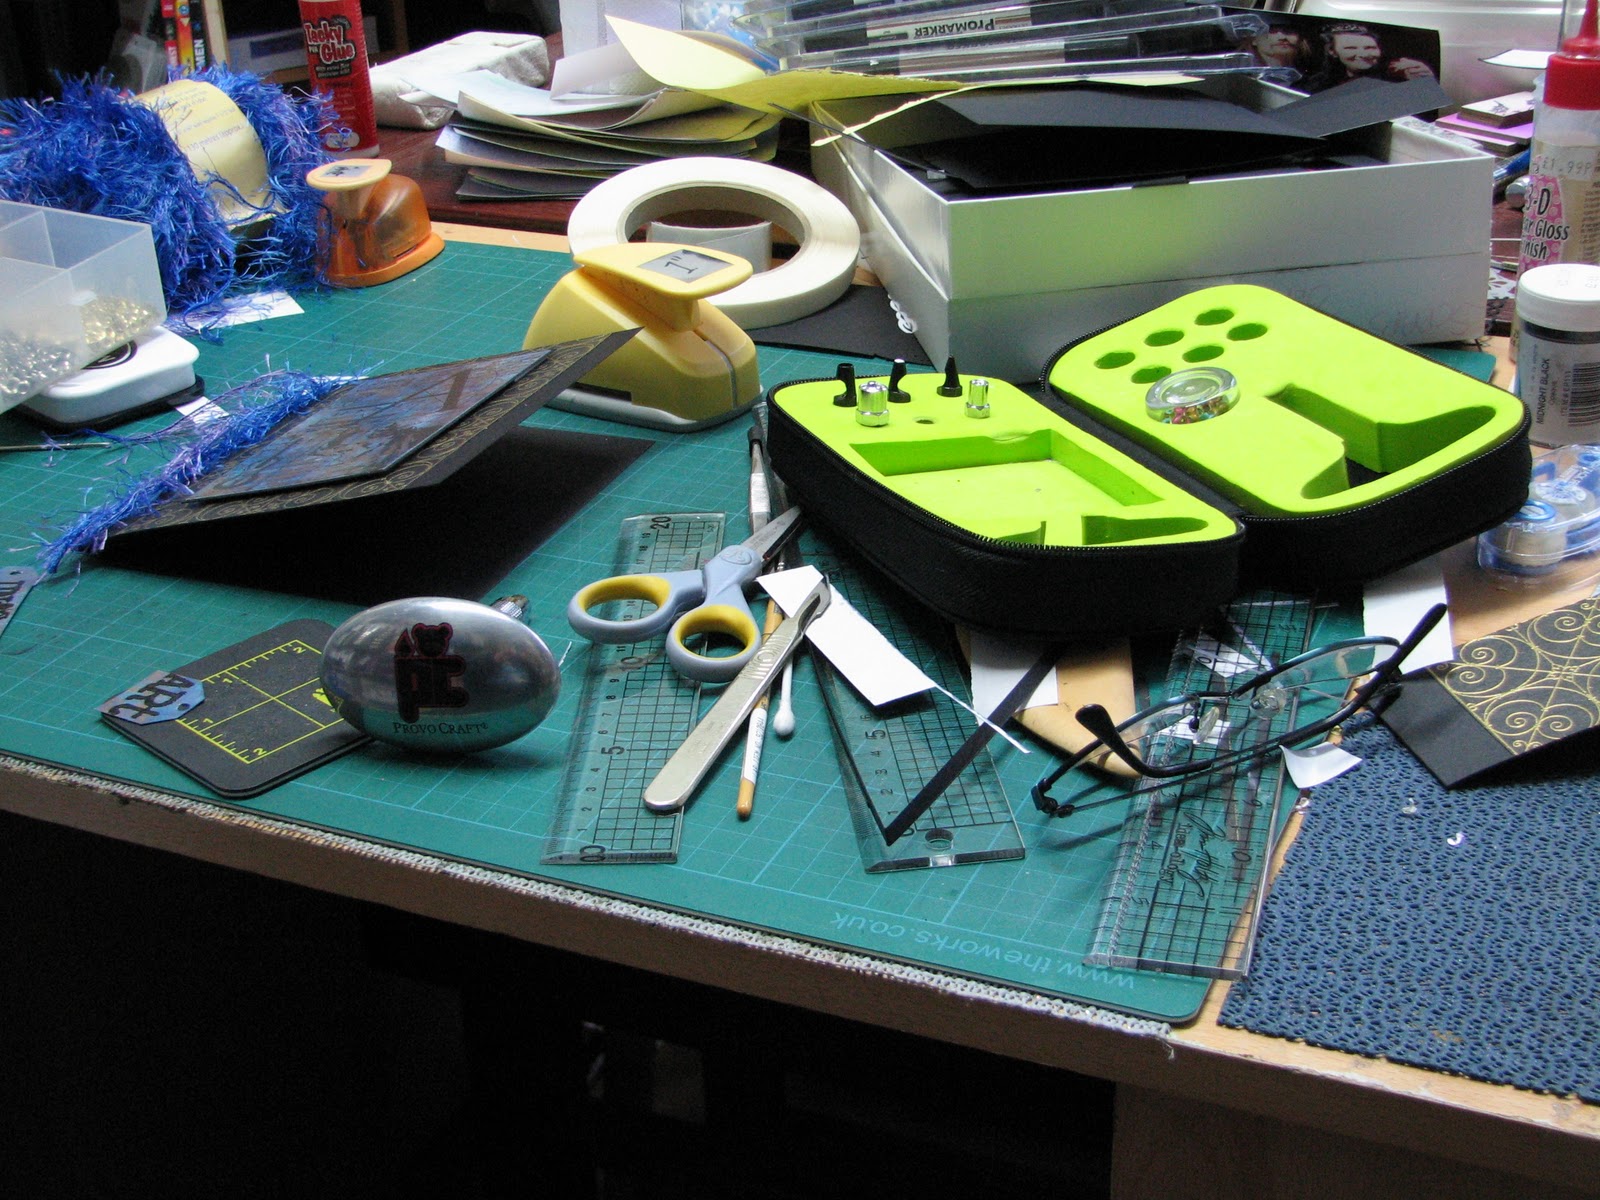
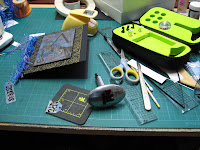
On my desk this week, is a lot of untidiness!For putting this card together, I have a ball of Eyelash wool, a couple of square punches, my Tim Holtz ruler, and another clear gridded ruler,scalpel, Titanium non-stick scissors, dst, Memento Tuxedo Black inkpad,and Provocraft Silent Setter.
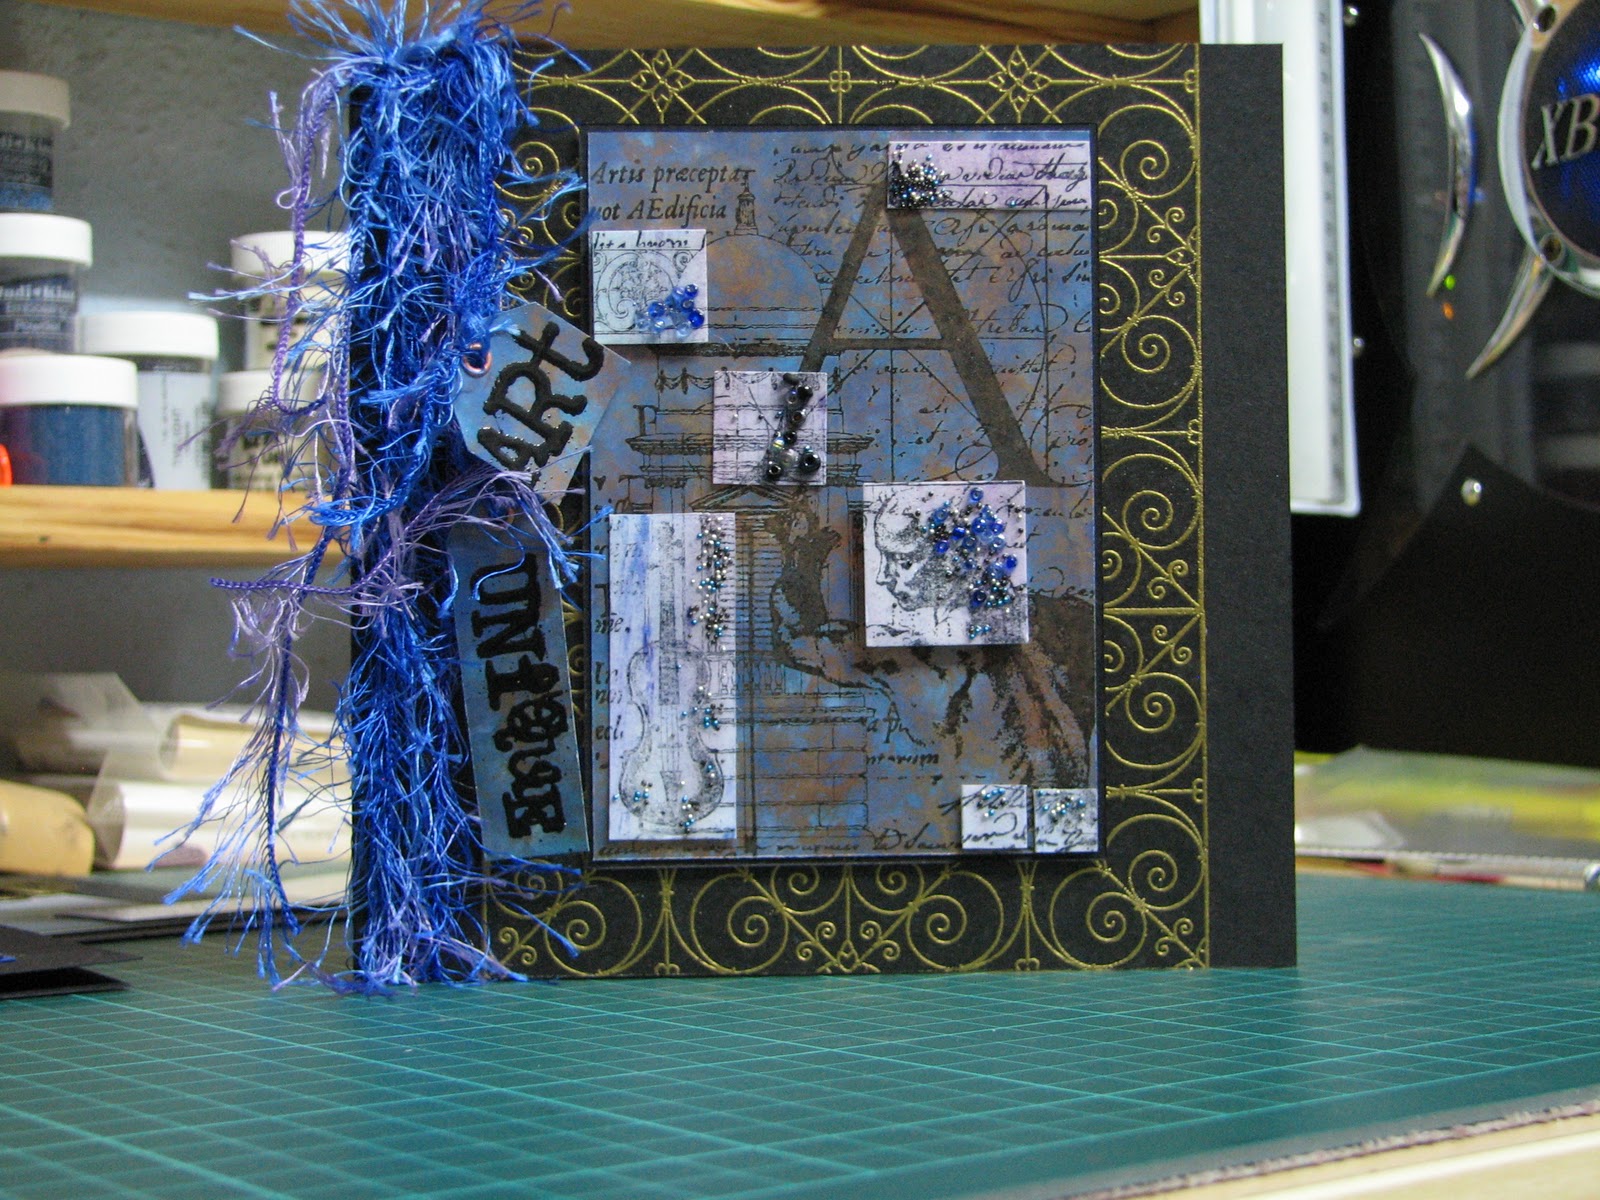
           The main image
(Illuminata, Inkadinkado) was stamped in Black Stazon on an alcohol ink background, using Blues & Purples, with Copper Mixative. I also stamped it onto an oil pastel background, also in blues & purples.
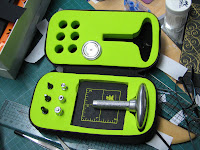
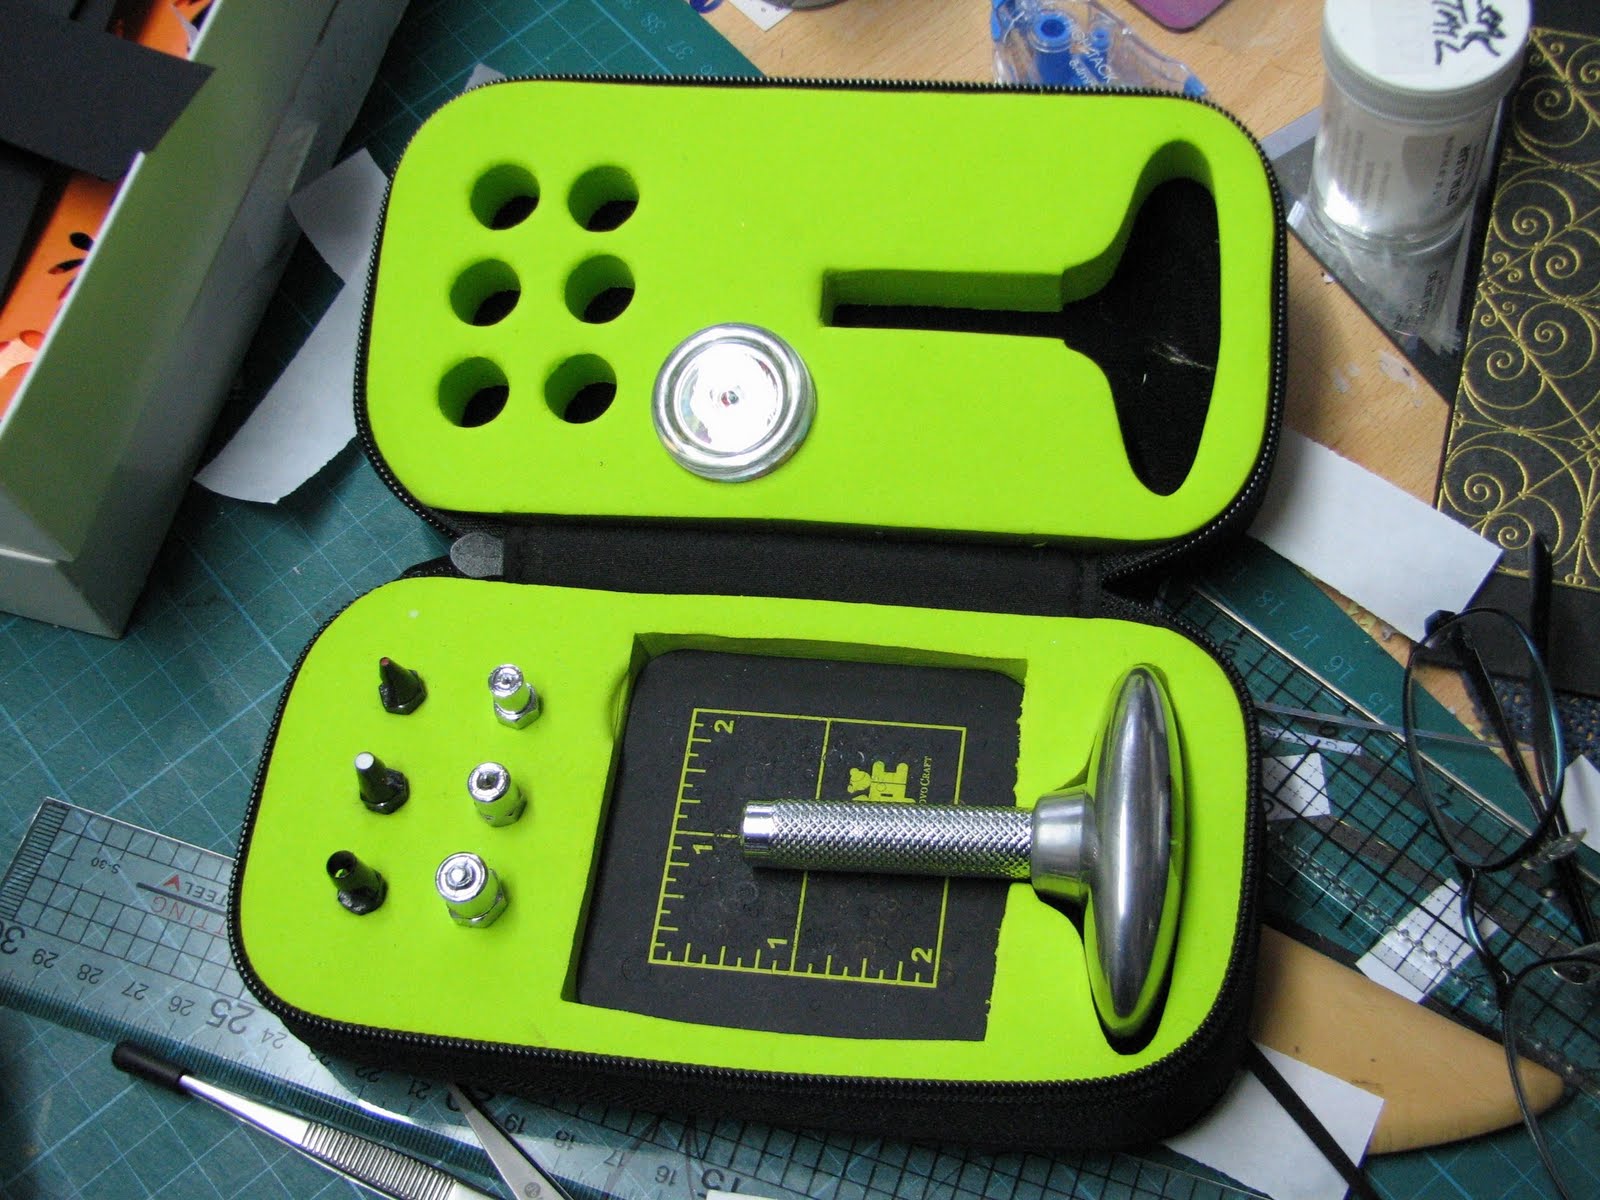
Silent Setter

The background panel is a Magenta stamp, 26019-R, stamped and heat embossed in gold on black paper.This panel was attached with dst to the front of the card base, a square black one.  The Illuminata image on alcohol ink was matted onto black card, then mounted on top of the Ornate panel. Then I cut and punched some random sections of the oil pastel print, coated these in Glossy accents and sprinkled with a few seed beads.These were then stuck over the corresponding parts of the original image, some with glossy accents, so they sit flat on the surface, and some with a little silicone glue to add dimension.

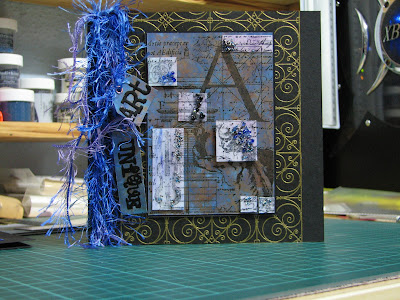
 Some blue eyelash wool was wrapped around the front of the card, and the phrase’ Unique Art’, Paperartsy, was stamped onto some offcuts of the Alcohol inked image.  I stamped the two words separately, by covering one with lowtack tape while I inked the other word, then peeling the tape off before stamping.They were then heat embossed using Black detail powder. This allowed me to cut both words into a tag, which had a copper eyelet added before being threaded onto the eyelash wool & knotted in place.

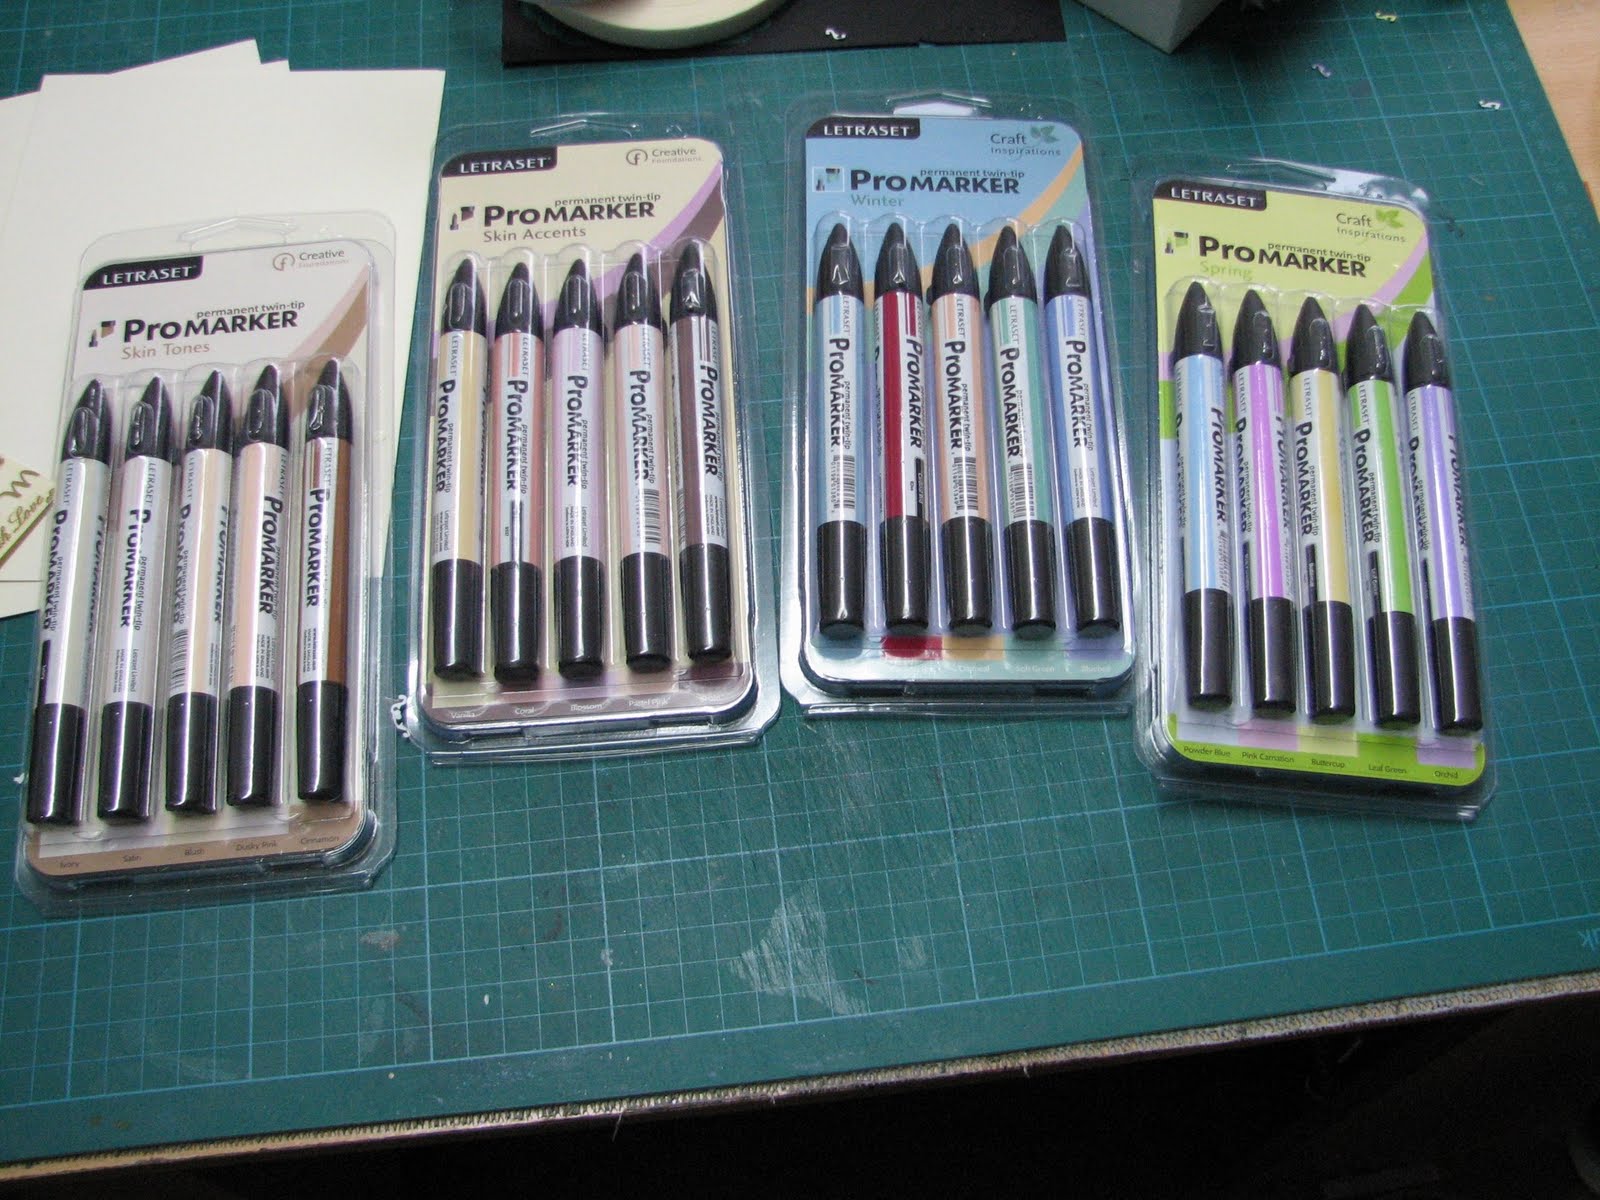
Next on my desk this week, is another bargain for you. I ordered theses Promarkers on Sunday, from Cowling & Wilcox, and they arrived yesterday.They are a bargain, because at C & W, these 5 packs are only £5.95. The 12 packs are only £11.85. And no, that is not a misprint. They really are that cheap. They do charge p & p, but if you enter this code : PROM211  in the promotional Code box, you will get FREE P&P until April 30th. They have all the packs too, not just a few.

 And thanks to everyone who liked my review of Paper Transformed last week, I am glad it was useful to you. As & when I get time, I will review a few other good craft/stamping books I have for you.
Quick reminder to all here in the UK, the clocks go FORWARD one hour this weekend!!!!

WOYWW #87

This is my desk for this week, and I must be honest, this is what it usually looks like when I am working! Valentines Day projects at the moment, some  have been  ordered, others are to take into work in case anyone wants one. The stamped Rose image is by Graphicus/Elusive Images, Harlequin Rose Themeplate. A couple have been stamped in black Versafine & heat embossed, the others stamped in Sepia Versafine only.I have also used a mix of card, white, cream and some marbled. The roses I have started painting with H2O’s/Artquest  palettes. The single rose is also a Graphicus image, stamped on acetate & glittered on the back. I punched out some envelopes, cut up some handwriting stamped text paper, and made a bundle of ‘love letters’ which is tied with ribbon. The gold filigree and Lattice hearts have been cut out with the Silhouette. I am posting this at a disgustingly early time, before I go to work,to give me more time to visit everyone else when I get home. So Happy WOYWW to everyone, and if you have just come across my blog, and haven’t joined in this before, visit Julias Stamping Ground Blogspot, to join in the fun and get to see lots of crafters desks & workspaces, for Whats On Your Workdesk Wednesday.