Crafty Individuals Butterfly Square

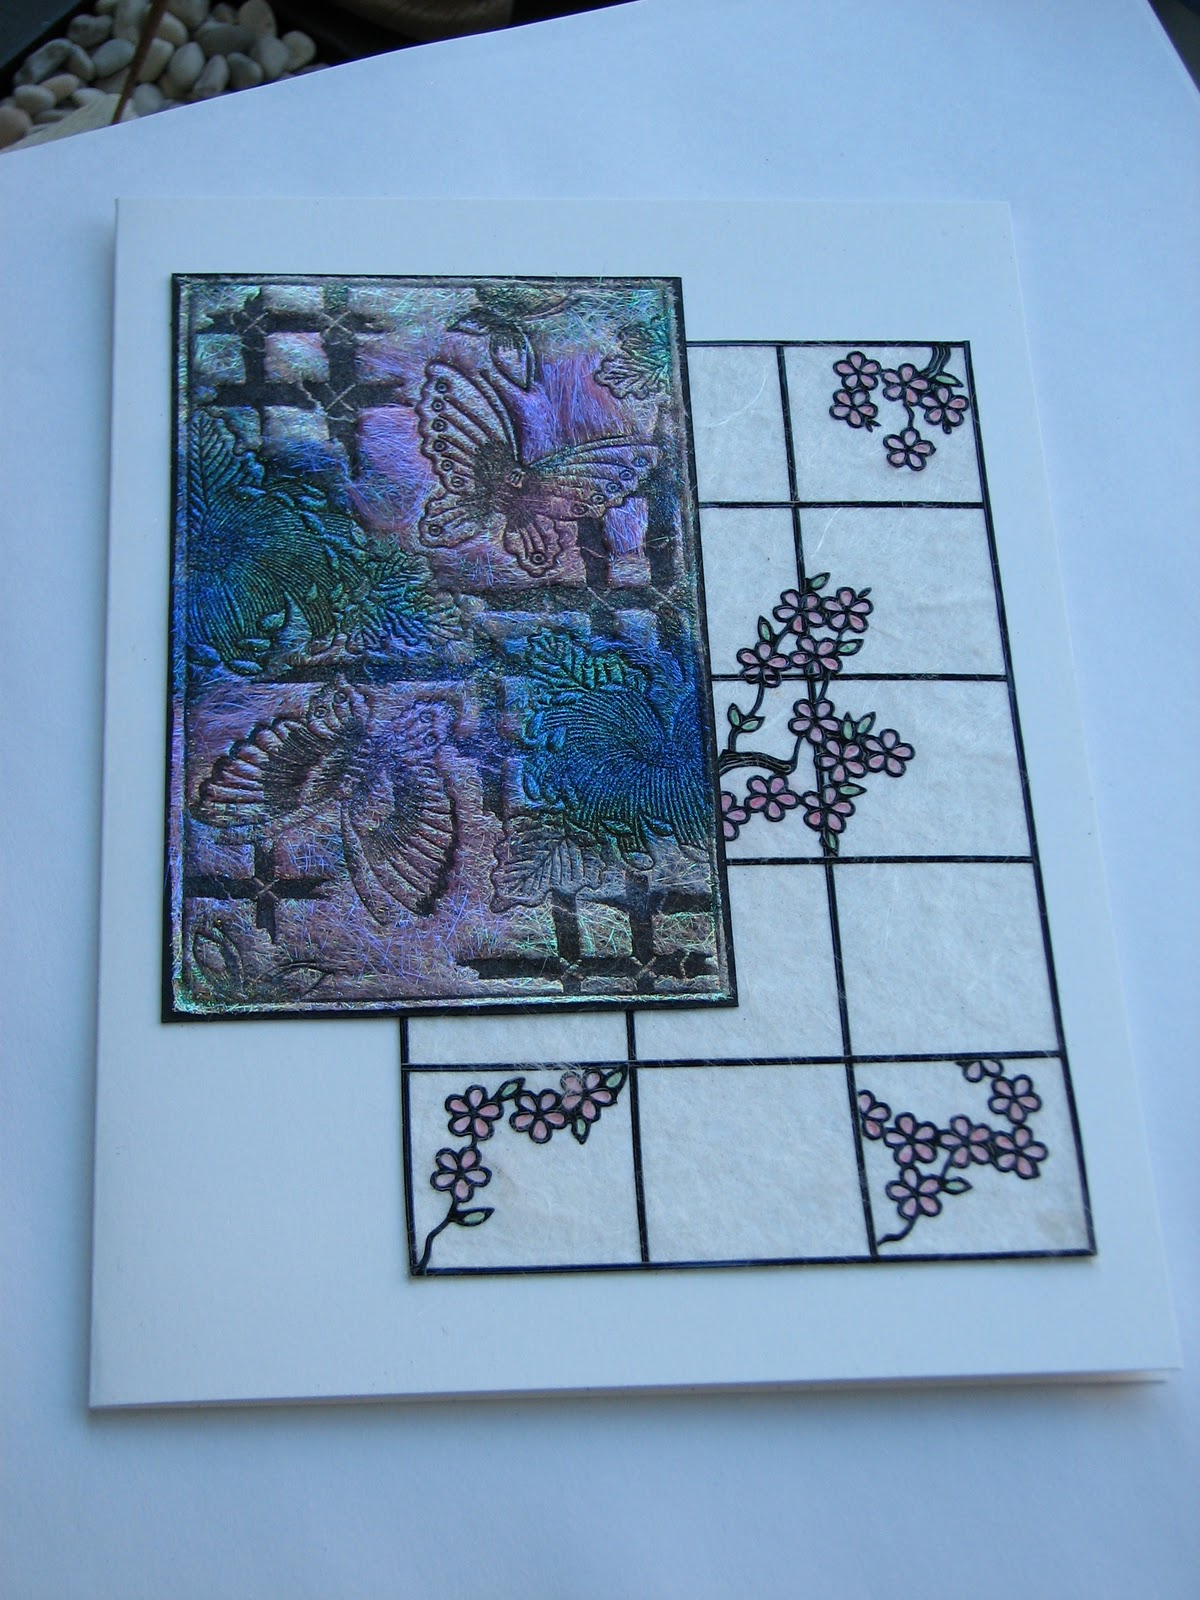
This card features all Crafty Individuals stamps and paper. The background sheet comes from one of their pads of 6×6 background papers, Book 4, Trees. This was overstamped, using Adirondack Denim ink, with CI 021, which is a mixed words stamp. I can’t find this exact stamp on their site now, so possibly it is retired, although there is a very similar one, CI 012. The base card is dark blue, scored & folded, then cut down to 15cm square.
 I cut down the sheet to fit the front of the card, and matted it onto black card. A length of Navy Blue ribbon was wrapped around this panel, then knotted , placing the knot towards the bottom. I mounted this centrally
 on the card front.
The Butterfly Square, CI 135, was stamped in Memento Tuxedo Black, then heat embossed. The image was coloured using Promarkers, then cut out & matted onto Dark Brown cardstock.I mounted this at an angle in the lower right of the panel.
 A Blue butterfly was made from the same stamp using fusible fibres, and I attached this with silicone glue, which also secures the wire anthers.
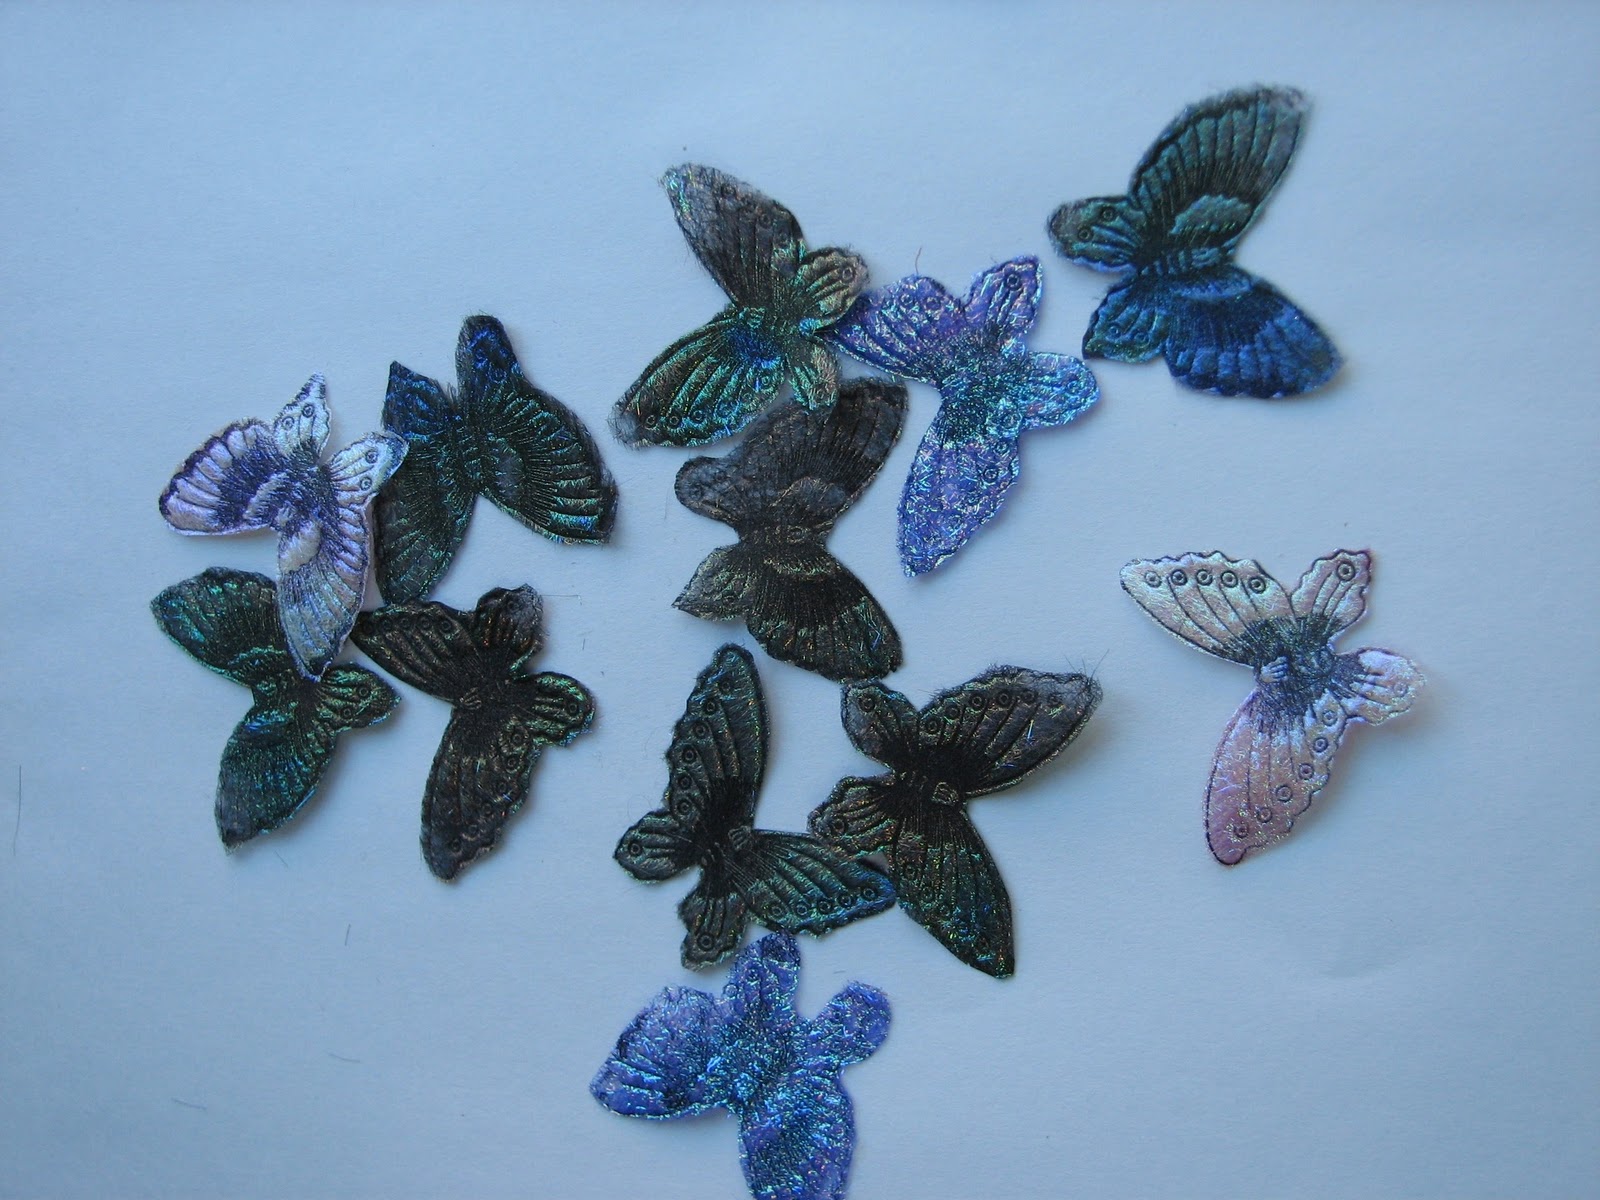
He is actually a little difficult to see in the main picture, he looks like a patch of blue background colour!, so here he is on his own,lol. Oddly, the butterfly looks bluer in this picture than it does on the card- I was not exactly pleased with how it came out. I have 3 or 4 shades of blue fusible fibres, but they all seem to develop a green tinge when the fibres are heated.

WOYWW #91

This is a semi- finished project on my desk this week, using the Butterfly panel I have used before, but this time done entirely with Angelina fusible fibres. The panel was matted onto black card to give it a little stability. I also wanted to create a shoji screen type panel, and had had in my mind for a while now to do this with mulberry paper and heat embossing. I didn’t take into account the fibrous nature of the paper, which attracted, and held on to, all the embossing powder! So I had to resort to peel-off lines, as I wanted the shiny look of embossing. I then decided the panel looked too plain, so added some flowers in black peel-off in, and spreading over, some of the squares. To add colour I used ordinary pencil crayons, as anything wet, like Promarkers/inks etc, spreads in the fibres. I think I shall try this again, next time using giftwrap type tissue paper- I should be able to emboss that without difficulty.
The various textures give a lovely tactile element to this card.


I also made myself a handful of extra butterflys using the fusible fibres.

Last thing on my desk for this week is a few Inchie
squares, punched from spare pieces of the panel I used in the Birthday card below, covered in Anitas 3D Clear Gloss, with a few Accent beads scattered into the wet medium. I found using an old document pocket to work on made the squares easy to remove – the gel doesn’t stick to it.

Friends are Like Angels….

This one uses the Penny Black stamp Aspire, and it was stamped using Forest Moss distress ink on the stems, and Colorbox Cats Eye Terracotta on the flowers.The background was brayered with Adirondack Lemonade/ Sunshine Yellow/Butterscotch. The image was stamped 3 times at various heights, then cut into 3 panels, the centre one wider than the outer ones.They were matted onto a dark orange piece of card.I used the Quickutz embossing folder, Diamonds & Dots to emboss a sheet of white card, cut it to the length of the folder and twice as wide. The phrase, Friends are like angels, Hobby Art GR1353DD, was stamped in Butterscotch onto a similar piece of brayered card as the one I used for the image.This was cut out with a large Nestie Petite scalloped oval, and a matt cut out in dark brown with the largest die.The base of the card was covered in a matching sheet of paper, Papermania Earthtones pack. A butterfly brad was added to the panel before it was stuck in place.

Easel Card 1

This is the first of the Easel cards made with some of the stuff off my desk for WOYWW this week. I thought I would have a go at easels, and they are really very easy & effective. I have put a short tutorial on a page HERE for the folds and construction. The stamped panel was brayered with Adirondack Sandal, Lemonade and Citrus then left to dry. The image is called Aspire by Penny Black, and was stamped three times across the panel. I inked up the stems using Distress Forest Moss, and added the flower colour using Cats Eye Terracotta then the flowers had sparkly embossing powder added and heated. The panel was then cut into three, with the centre one being slightly larger, and matted onto dark red card. I cut my base card to the width of my stamped image, then scored and folded to create the easel.The part the card will stand on was covered in a dark green paper. I trimmed down the offcut from my card to make the panel that is the stopper.A piece of clear vellum was embossed with the D’vine Swirls Embossing Folder, cut down to slightly larger than the card panel, then edge punched with a Fiskars Heart Border punch. I added this to the panel with a small piece of DST in the centre only, where it will be hidden by the sentiment.The sentiment was stamped & heat embossed onto an offcut of the red card, then onto an offcut of the dark green paper. A silver Heart brad was added at either end. The lacy panel was adhered to the card base with foam pads, then the sentiment added to this with silicone glue, so I could angle it upwards slightly. The image panel was then added to the card ‘front’ with DST, and a butterfly made from Fusible Fibres was stuck down with silicone glue.

   TIP: to emboss vellum successfully in a cuttlebug folder, either use a very thick vellum, as it is available in different weights just like card/paper, and PDA card & paper (link in the sidebar) do a nice thick one that works well, OR if your vellum is thinner, use two/three sheets in the folder at the same time- this helps prevent the vellum from tearing, as it does not stretch in the same way card or paper will.

Easel card 3

This card uses a stamp called Flying Stars, Penny Black 3636K. I stamped in black Versafine twice  onto card that had been brayered with Adirondack Shell Pink, just using one colour to build up over the card. I added an acrylic gem to the centre of each flower, and a small padded butterfly to the top of the image.This was then matted onto black card and trimmed. The actual card was cut to the width of the stamped panel and scored & folded. For the base of the card, I cut a panel of pink flowery vellum, and edged it with a pink peel-off border.To make up the base ‘stopper’, I cut a small panel from the offcut of the base card, and added a punched border  made from white paper using a Dovecraft border punch.I wrapped a length of pink organza ribbon around this then added  a stamped sentiment using an offcut from the brayered pink card. Two Nesties from the Long Classic Scalloped Rectangles Small set were used to cut this out & matt onto black card .Silicone glue was used to adhere this over the ribbon, then three acrylic heart gems added to the panel, also with silicone glue.Once the base was complete, I stuck the image to the easel with DST.

Oriental Butterflies

Two versions of the same stamp,which is available as part of a sheet from a couple of suppliers: Tanda Stamps,Far East set 1,where it is also available as a single stamp,and in both rubber or clear polymer, or from Non Sequiteur, Plate 67, Samurai Plate. Apart from the Butterfly block, both plates have different stamps on them. For both cards, the butterfly block was stamped in black ink, then heat embossed, onto alcohol ink backgrounds. The butterflies, flowers and leaves were all painted with H2O’s.For the black & red card, the design was then cut into 8 tiles then remounted onto black card, trimmed then matted onto a second sheet of inked card. The sentiment was stamped onto a scrap, matted onto black card and fixed with foam pads.The butterfly embellishment was made using fusible fibres over the butterflies on the block, then cut out and mounted with silicone glue. An Oriental coin had a length of black/gold mizhuiki cord threaded through it, and was attached with silicone glue in the opposite corner.
This card is an example of how a card can change as you are constructing it, and of the benefits of putting it aside if you aren’t happy- coming back to it later often helps. This one was originally cut into 4 horizontal panels, then re-matted onto black card. I wasn’t sure about it, so left it and completed the blue one.When I looked at it again, I thought the 8 squares would work better, maybe because it seems to mimic the oriental Shoji panels?
For the blue card, the background is printed from a Joanna Sheen cd,Tales of the Orient.The kanji strip on the left was done in triple embossing, using black ink as the base. The sentiment was stamped onto a scrap of inked card, and small black brads added in the corners.

Dragonfly, Butterfly, Bee

The stamp is #90349,Dragonfly, Butterfly, Bee, The Tapestry Studio Collection, from Stamps Happen. I stamped the image first on a brayered background, then used fusible fibres to make each of the images.These were cut out and mounted onto the three panels with silicone glue.The base card was covered in paper from the Papermania ‘Simply Elegant’ paper pack. The sentiment is from an Elusive Images themeplate, stamped onto a little of the brayered background and an eyelet added for threading. Eyelash wool was wrapped around the card and crossed on the front, the sentiment threaded on, and also a butterfly charm.