Mixed Monochrome

Ok, I promise this is the last of the monochrome for now(maybe). I just wondered how it would come out if I mixed the two types of images. Better than I expected, to be truthful, lol.I matted the squares onto a black/gold coloured base, then this onto black,white and then black again. I used some of the PDA card in white with silver flecks, and some black & white yarn around the front. As I said in WOYWW, these aren’t true ‘inchies’, as they are closer to 1 1/2″, but I like the size- gives a good sized panel, in whichever format you lay them out.

Double the fun

These are some more images I stamped & coloured of the Morning Glory, but I wanted to create some different backgrounds from the alcohol inked ones. I decided it was time to play with some mica sprays I have to give me some pastel backgrounds.

At first the colours seemed a little too strong for what I  wanted, but how to tone them down?

Then I looked at the box of tissues by my workdesk.

So I dropped a tissue over the card, and lightly pressed it down. When lifted off, I was left with a lovely muted sheet of card, which still retained its mica sheen.

     I also got some interesting texture effects depending how much pressure was put on the tissue-

As usual, I got carried away with the technique…..

But, best of all, I had lots of lovely coloured tissues….which I also put aside to dry, and now I think these may come in very useful for working with the canvases! Oh, and the tissues also have a mica sheen to them!

Using my trusty stamp positioner to place my image to its best advantage….


WOYWW #92

 Happy Whats on your Workdesk Wednesday to everyone, if you have found this at random, pop over to the Stamping  Ground to see what its all about, and maybe join in.

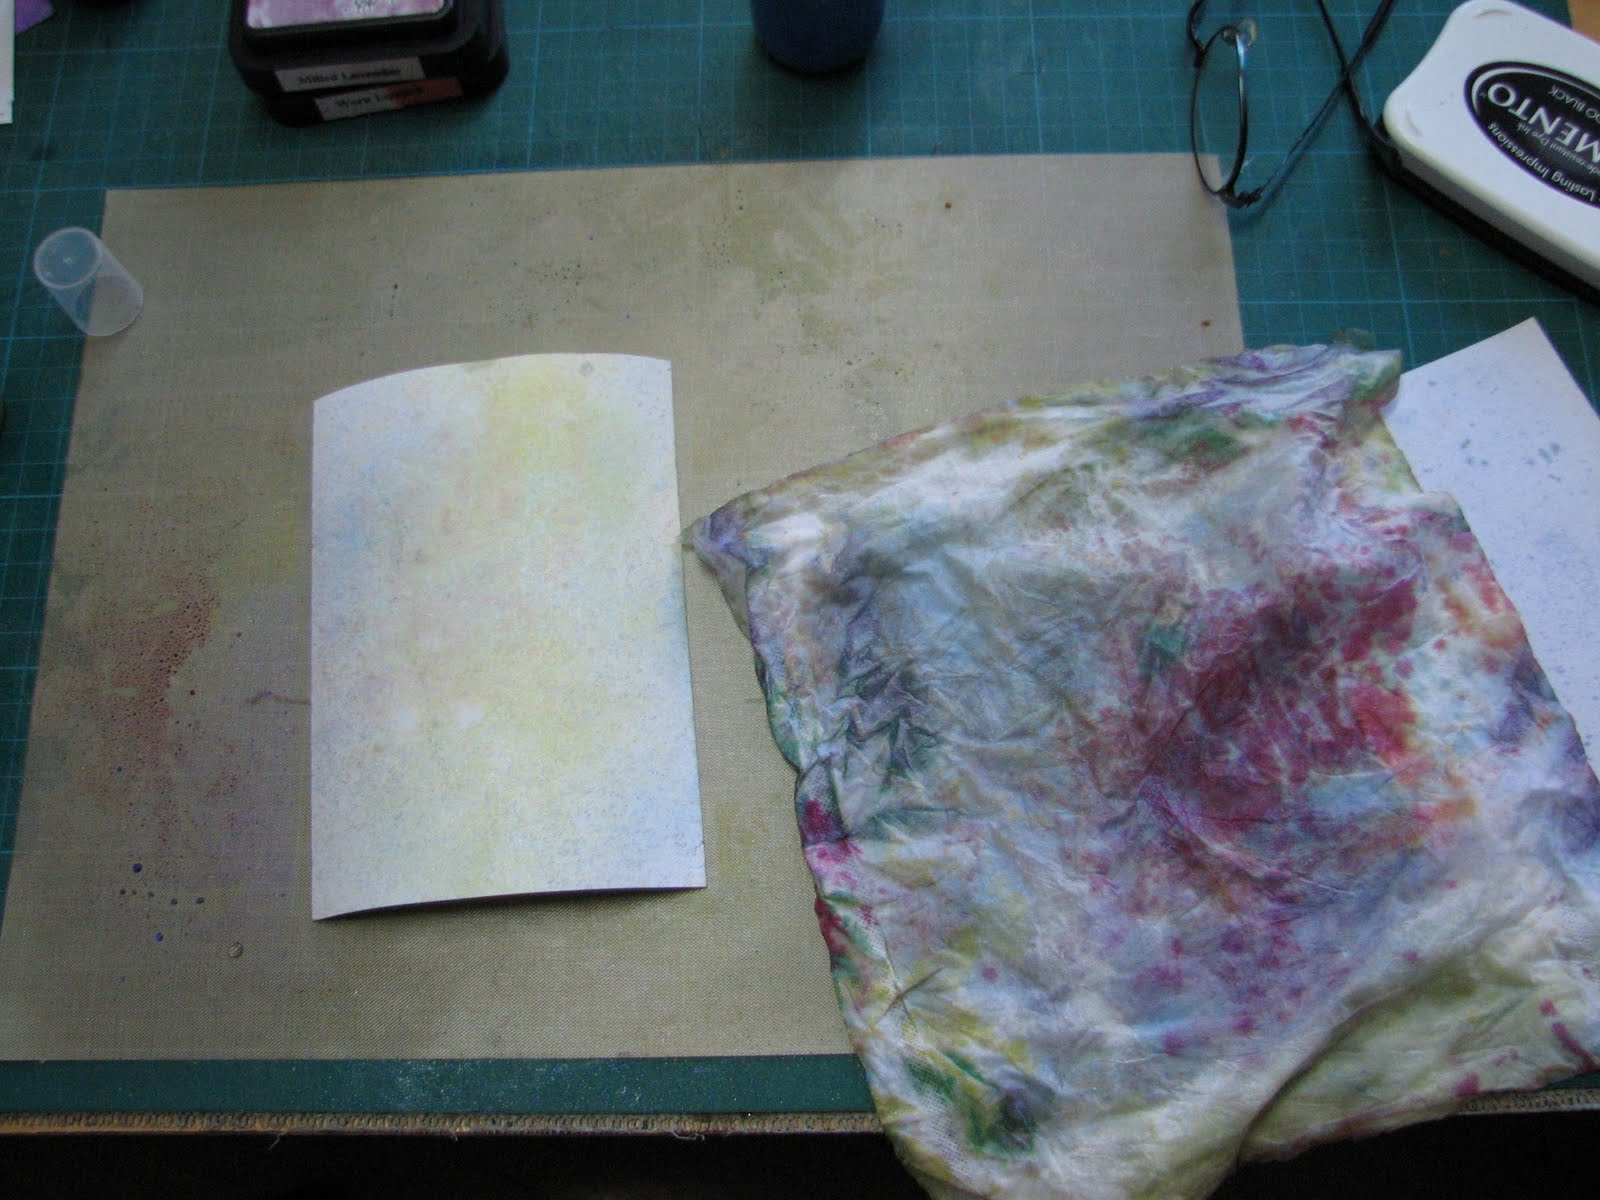
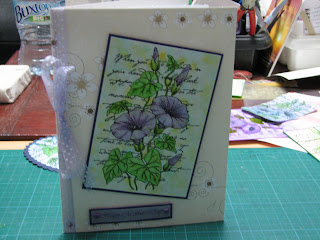
 The first of the items on my desk this week is a Mothers Day card, made with an Elusive Images plate, Morning Glory.It was stamped in Memento Tuxedo Black onto an alcohol ink background, then coloured with Promarkers.The base card was covered with paper from the Papermania Antique Cream pad, the image matted onto dark blue card, then layered with foam tabs. Purple dotted organza ribbon tied around the spine. The sentiment was computer printed onto vellum, heat embossed, then
attached to blue card with heart brads.

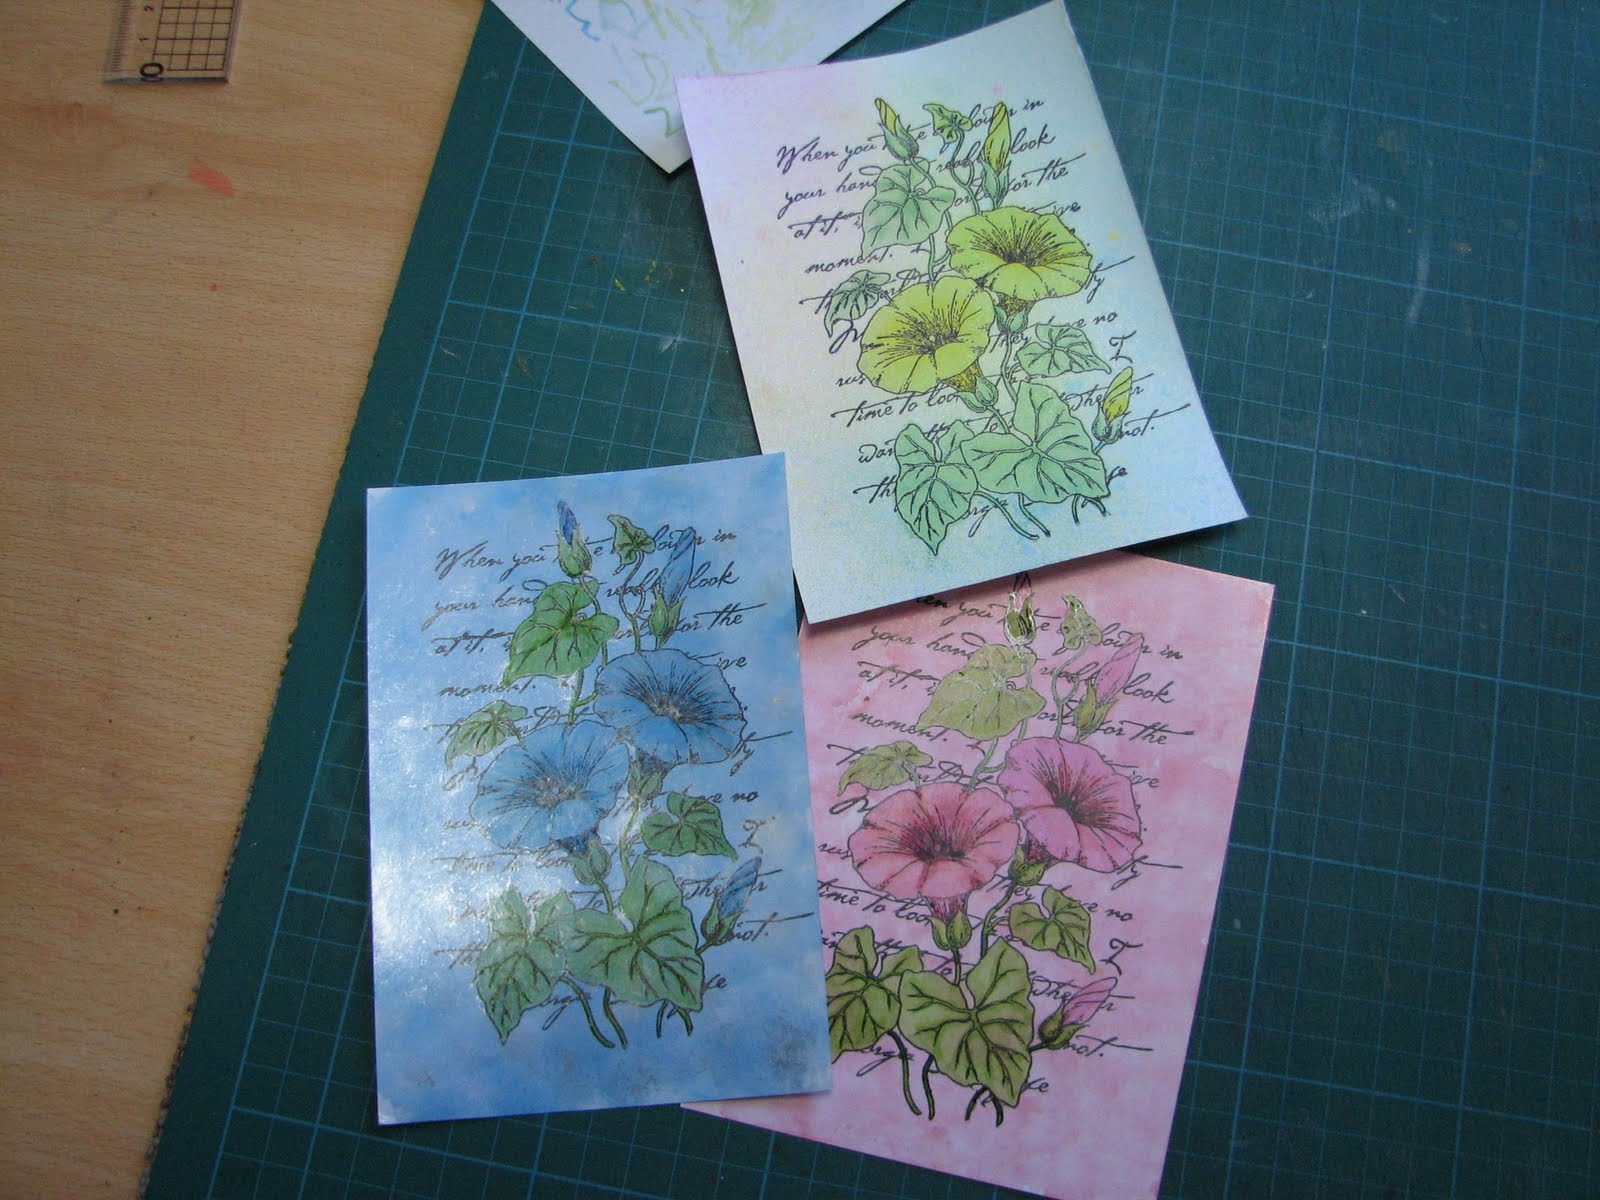
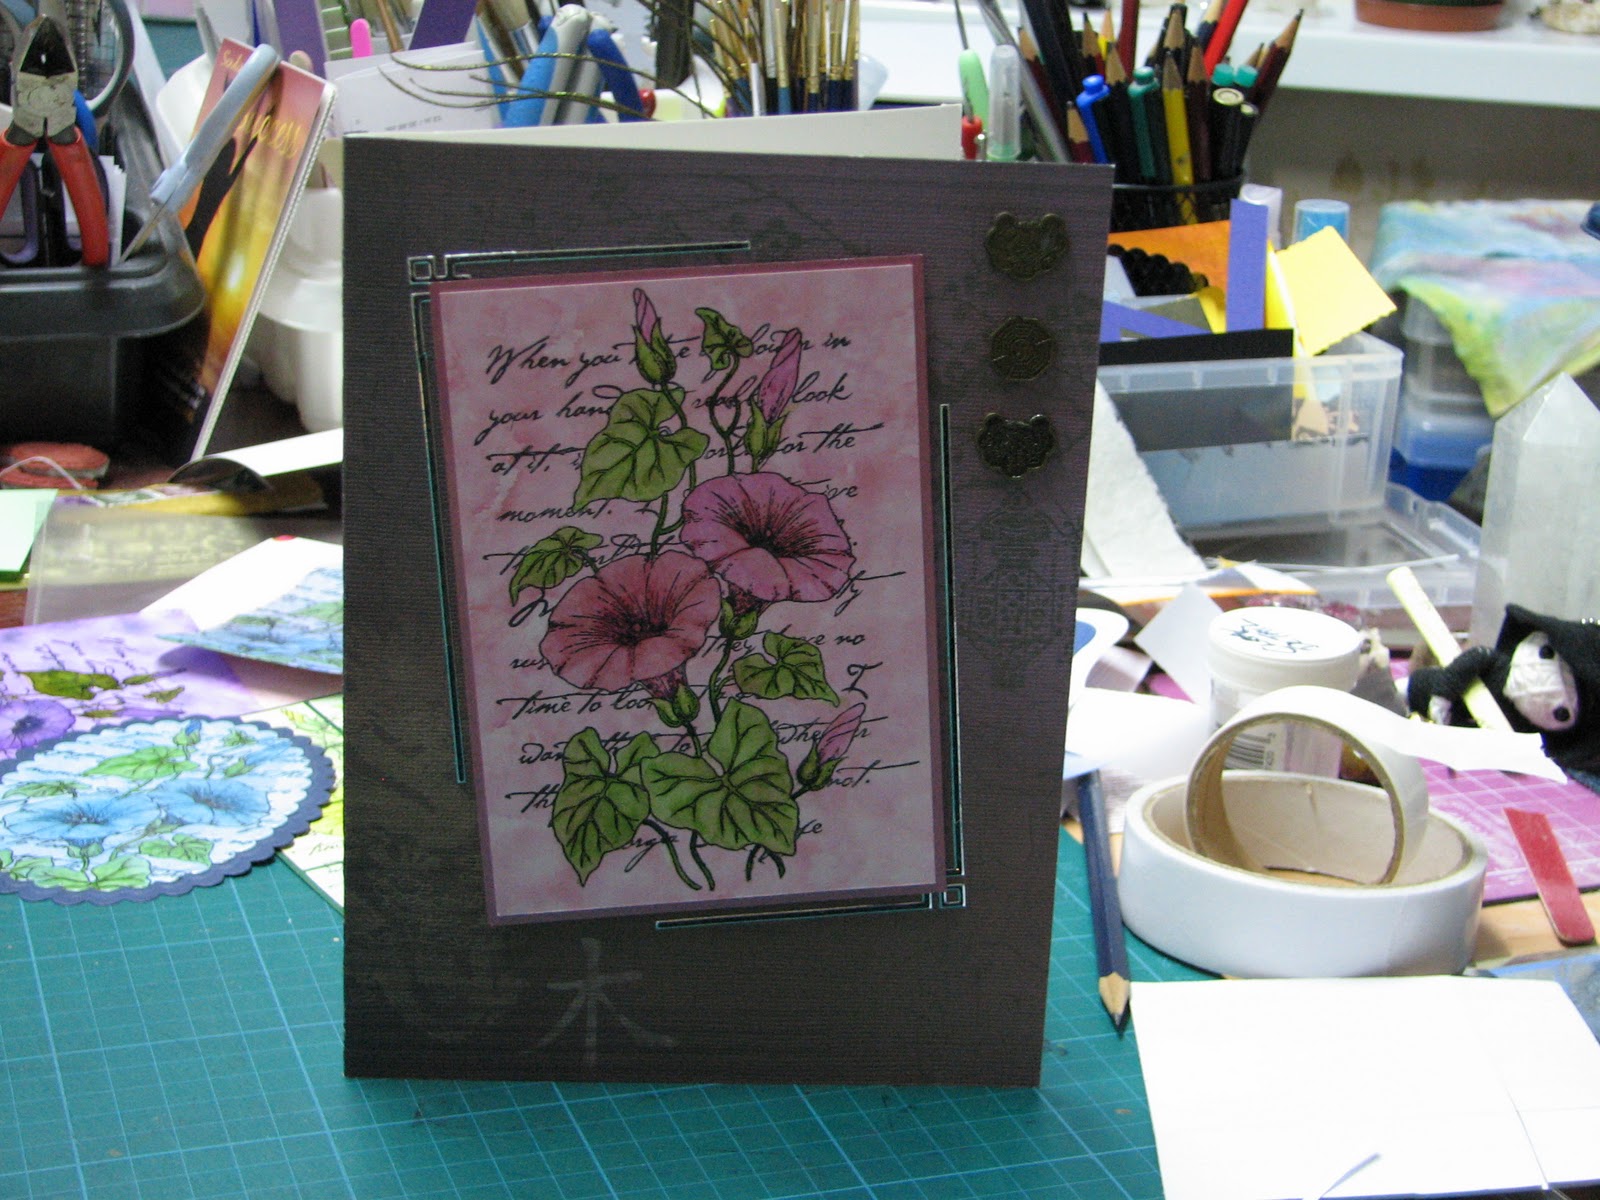
The second card using the same stamp, this time onto a pink alcohol ink background, matted onto pink pearlescent card. A sheet from The Far East paper pad was used to cover the base card.I used black peel-offs to create the line frame around the panel, and 3 small chinese coins added to the top right corner.

The third card, this time on blue/green alcohol inks. Matted onto dark blue card.The embossed background is a Quickutz embossing folder, Diamonds & Dots, which I embossed to the width of the card by putting the folder through the ‘bug sideways.Dark blue gingham ribbon added, a sentiment stamped and matted onto an offcut of the lattice background, which was cut to a tag shape.I added some narrow blue ribbon tails, and a bow.


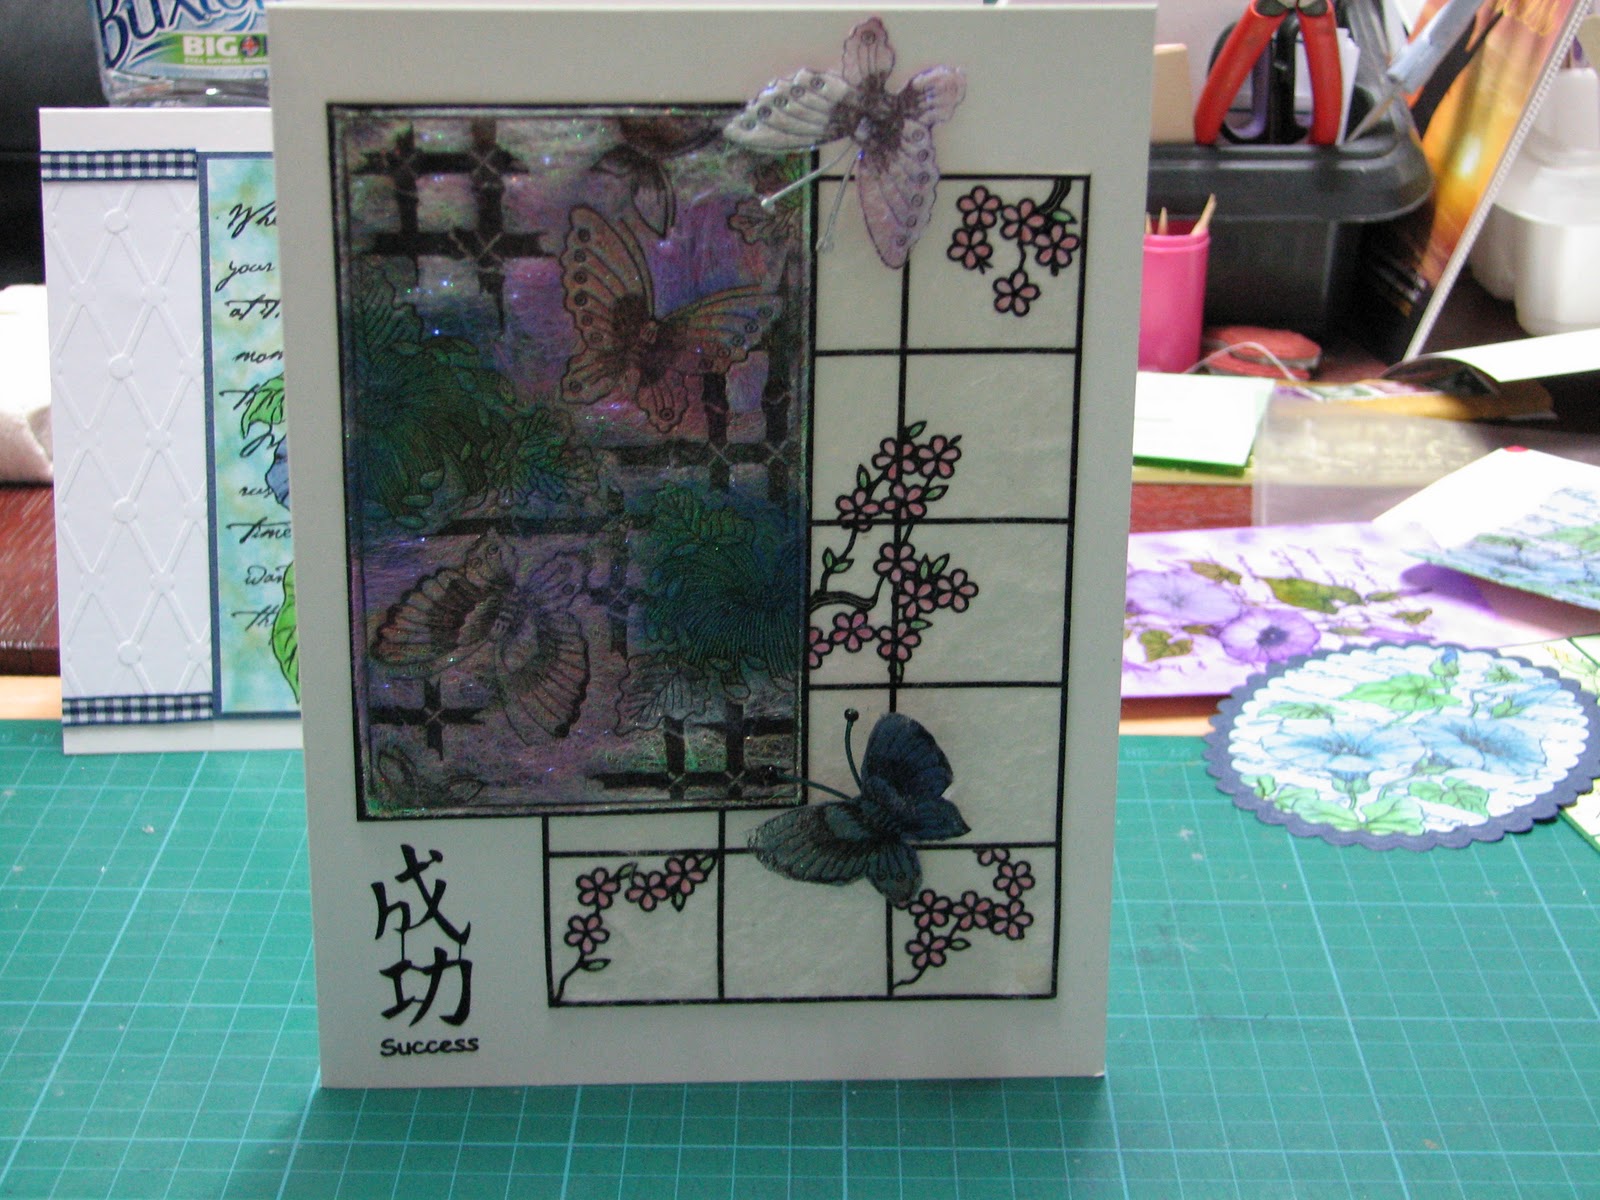
This is the card from last week with two of the fibre butterflies added. They were given anthers made from mizhuiki cord, with a tiny bead on the ends. I added a peeloff oriental sentiment, as all the stamps I have were just a little too big for the space.

The last thing I want to share with you, will probably have lots of you rushing off to your nearest branch of The Works!

I found these in there last week- tiny canvases with easel, as you can see, 99p each! The canvas measures 3 1/2 in (9cm)  x1 3/4 in(7cm), and is 1 cm thick. I have a couple of projects in mind for these, for a birthday gift later in the year. Though I shall probably get a few more, ‘just in case’, lol.

WOYWW #89


Two cards on my desk this week, both using Crafty Individuals stamps.The card on the left uses the 4 Birds stamp, CI 184, and Owl Postage, CI 225. Both were stamped onto an oil pastel background made with yellows and browns, using Staz-on black. I cut the four birds into individual images, and trimmed the owl stamp down to the postage stamp edge. I matted this onto gold card, and trimmed down to leave a border, using a stamp edge blade.  I then cut a sheet of gold card to size slightly smaller than the card front, which is an A4 sheet of cream linen card scored & folded, and used landscape format. I cut the gold card into four sections and added some matching paper from the Papermania Earthtones pack. Two panels had very narrow brown ribbon wrapped around, then all the images were put in place, sticky tabs used on the two bird images that overlap the owl. A small greeting was added to the final blank section.
The card on the right  uses CI 001, dragonfly postal stamped onto an oil pastel background made with blues & greens. A sheet from Papermanias ‘ Antique Cream’ paper pack was used to cover the front of the card, then I tore 8 strips from toning mulberry papers, and attached these in a wave across the front of the card. The stamped image was matted onto a scrap of dark blue card, and trimmed down to leave a very narrow border. Two dragonflies were made using Fusible Fibres and the dragonfly on the stamp. These were attached with silicone glue.8 small flowers were punched from pearl paper, in toning colours, and paired up, overlapping the petals, and secured with a yellow brad, again attached with silicone glue.
How to make the oil pastel backgrounds is shown on one of my pages.

I thought this may be of interest to anyone with a Tesco nearby. I went in earlier this week, and in their £1 promotion area, I found this pack of 10 DL size storage wallets, like the sort sold for storing peel-offs. I thought they would be really useful for scraps and offcuts of paper/ spare stamped images/etc, and ten for a quid is a real bargain! So much so, I think I will be getting another couple of packs when I go in again- you can never have too much storage, can you?

And talking of storage, here is how I store my brass stencils- photo albums intended for 7 x5 photos, they cost me around £2.50each, again they came from Tesco, in one of their end of line sales, I think. I have adapted some of the pockets, dividing them down the middle with a row of staples, or in some a row across the centre, then cutting a slot in the side, depending on the size/shape of the stencils.

Happy Valentines Day

I’m still with the easel cards, lol. I think I’ve got stuck here. Its nice to have more than one surface to adorn, though.This is todays Valentines card, using one of the Elusive Images Rose plates  from my desk a couple of weeks ago.Matted onto black & Burgundy card and tied with ribbon. A sheet of rose patterned paper was used to cover the card front.

  The triple embossed hearts were made by inking first with a mix of Fired Brick, Barn Door and Aged Mahogany Distress ink, then a few were stamped with a word stamp ‘LOVE’ before covering with Clear embossing ink.

 Sprinkled with UTEE, 3 layers, then some were overstamped with a swirl stamp and Gold Encore Ink.The INK IT UP Pad is my clear Embossing pad- It picked up red ink the first time I used it for this, so I keep it for Reds. These pads are really cheap- only a couple of pounds, so its no loss. The Really Useful Box with the spoon in it is my UTEE- I bought it off e-bay, loose in a bag- much cheaper than buying a branded jar.
They were attached with a few dabs of silicone glue.

For the base, I covered it in a pale gold paper stamped with a lovely Baroque style stamp, by Magenta, 26019-R.

This is the stamp, and this is what it looks like when stamped a number of times to make a larger sheet. Stamped in Gold Encore, and heat embossed with Gold detail powder.

The stopper part of the card was made by cutting a band of black paper which was punched along both sides with the Martha Stewart ‘String Lace’ Border punch, then a panel of cream card that had been stamped with Hero Arts ‘Italian Poetry’ , S1832, in Gold and heat embossed. The Valentine greeting was stamped & heat embossed  in Gold again on plain vellum, then matted onto black then burgundy card, held together with a gold heart brad either end.The panel was attached with foam pads.

As I had a few images, and quite a lot of hearts, I made up some more panels, as I think this will come in handy for Weddings/Engagements/Anniversaries.

Easel Card 1

This is the first of the Easel cards made with some of the stuff off my desk for WOYWW this week. I thought I would have a go at easels, and they are really very easy & effective. I have put a short tutorial on a page HERE for the folds and construction. The stamped panel was brayered with Adirondack Sandal, Lemonade and Citrus then left to dry. The image is called Aspire by Penny Black, and was stamped three times across the panel. I inked up the stems using Distress Forest Moss, and added the flower colour using Cats Eye Terracotta then the flowers had sparkly embossing powder added and heated. The panel was then cut into three, with the centre one being slightly larger, and matted onto dark red card. I cut my base card to the width of my stamped image, then scored and folded to create the easel.The part the card will stand on was covered in a dark green paper. I trimmed down the offcut from my card to make the panel that is the stopper.A piece of clear vellum was embossed with the D’vine Swirls Embossing Folder, cut down to slightly larger than the card panel, then edge punched with a Fiskars Heart Border punch. I added this to the panel with a small piece of DST in the centre only, where it will be hidden by the sentiment.The sentiment was stamped & heat embossed onto an offcut of the red card, then onto an offcut of the dark green paper. A silver Heart brad was added at either end. The lacy panel was adhered to the card base with foam pads, then the sentiment added to this with silicone glue, so I could angle it upwards slightly. The image panel was then added to the card ‘front’ with DST, and a butterfly made from Fusible Fibres was stuck down with silicone glue.

   TIP: to emboss vellum successfully in a cuttlebug folder, either use a very thick vellum, as it is available in different weights just like card/paper, and PDA card & paper (link in the sidebar) do a nice thick one that works well, OR if your vellum is thinner, use two/three sheets in the folder at the same time- this helps prevent the vellum from tearing, as it does not stretch in the same way card or paper will.

Easel Card 2

A piece of white card was brayered with Adirondack Shell pink, then left to dry completely. The Penny Black stamp ‘Aspire’ 3381K, was stamped 3 times across the panel in Ancient Page Flannel, which is a dark grey, then the flowers only had a little sparkly embossing powder added to them and heated. I cut the image into three panels, with the centre one being wider than the two outer ones and matted them onto a piece of pale mauve card.This was trimmed to leave a narrow border, and a length of dotted mauve ribbon wrapped around and secured on the back with DST. A small bow was made and added with a glue dot.
My base card was cut down to the width of my stamped panel, scored and folded.The part of the card that will form the base it stands on was covered in a Purple lined paper, again adhered with DST.
To make the ‘stopper’, I cut a panel of silver card, and punched two strips of dark purple vellum to make the lacy edge. This was done with a fancy corner punch with the guides removed. The vellum strips were attached either side of the silver panel  with DST. I punched another strip of the purple vellum with a butterflies punch, from X-Cut, and stuck this along the centre of the silver card then edged with silver peeloff border. The whole thing was then trimmed to size and mounted to the base with foam pads. A sentiment was stamped and heat embossed, then cut out using a petite scalloped oval Nestie die. A hole was punched either end, and a small piece of the dotted ribbon threaded through, and mounted with silicone glue.

Oriental Butterflies

Two versions of the same stamp,which is available as part of a sheet from a couple of suppliers: Tanda Stamps,Far East set 1,where it is also available as a single stamp,and in both rubber or clear polymer, or from Non Sequiteur, Plate 67, Samurai Plate. Apart from the Butterfly block, both plates have different stamps on them. For both cards, the butterfly block was stamped in black ink, then heat embossed, onto alcohol ink backgrounds. The butterflies, flowers and leaves were all painted with H2O’s.For the black & red card, the design was then cut into 8 tiles then remounted onto black card, trimmed then matted onto a second sheet of inked card. The sentiment was stamped onto a scrap, matted onto black card and fixed with foam pads.The butterfly embellishment was made using fusible fibres over the butterflies on the block, then cut out and mounted with silicone glue. An Oriental coin had a length of black/gold mizhuiki cord threaded through it, and was attached with silicone glue in the opposite corner.
This card is an example of how a card can change as you are constructing it, and of the benefits of putting it aside if you aren’t happy- coming back to it later often helps. This one was originally cut into 4 horizontal panels, then re-matted onto black card. I wasn’t sure about it, so left it and completed the blue one.When I looked at it again, I thought the 8 squares would work better, maybe because it seems to mimic the oriental Shoji panels?
For the blue card, the background is printed from a Joanna Sheen cd,Tales of the Orient.The kanji strip on the left was done in triple embossing, using black ink as the base. The sentiment was stamped onto a scrap of inked card, and small black brads added in the corners.

You can’t cross the Sea….

Both main images are from The Stamp Man, the Antique Map, and the Ship Collage  are here.The map is stamped on an Alcohol ink background, the ship on a brayered one in similar shades. Both matted onto black card, the map is mounted with DST, the Ship image is raised with foam pads. The sentiment is from Butterfly Kisses, from a set called Nautical Collage. This is stamped onto a scrap of the Alcohol ink background and matted onto black card. I set it in place with silicone glue, so I could angle it slightly- it is raised from the card base at the top. Two dolphin charms were added, also with silicone glue. The dark blue card base was cut to 15cm square. I have entered this in the Simon Says Stamp & Show challenge for this week- using your newest stamp.

Believe in Yourself…

Another brayered background, the moon shape created with a post-it note circle.Here I used Distress Ink Milled Lavender, then Adirondack Purple Twilight & Eggplant. Agapanthus Cluster by Stampendous was overstamped twice in Archival Black, on the right hand side of the panel.The Birds stamp, from Lavinia stamps, was also stamped in Black Archival. The whole panel was cut down to 15 x 9 1/2 cm, then roughly 41/2 cm cut off the left side, onto which was stamped the sentiment.This is a stamp aquired from e-bay at some time, and I don’t know the maker, sorry.Both panels were matted onto dark purple card, leaving a small space between them. A scrap of purple organza ribbon was wrapped around one corner with a small bow stuck on top with a glue dot. The whole thing mounted onto a pale purple marbled card base, and a small dragonfly metal embellishment added to the sentiment panel.